Welcome to our humble discussion on installing plumbing fixtures! This guide will walk you through some basic steps that might help when you're considering adding new fixtures to your home. Let's roll up our sleeves and dive in!
Understanding the Basics
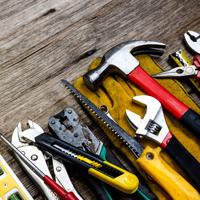
Before you start, it's essential to familiarize yourself with some basic plumbing terminology and tools. Terms such as "supply line," "drain," and "trap" are good to know. Basic tools often used in plumbing include a pipe wrench, adjustable wrench, and plumber's tape. Having these at hand will make your journey smoother.
Planning Your Project
Planning is an indispensable step in any home improvement task. Make sure to choose fixtures that complement your existing plumbing system and are compatible with your current water pressure. Reading manufacturer specifications can offer valuable insights here.
For instance, if you're installing a showerhead, factors like mounting type and spray pattern could contribute greatly to your satisfaction. Showers and Tubs
Gathering Materials
Once you've planned, gather all required materials. Besides the fixtures, you might need connectors, plumber's tape, and perhaps a few replacement parts if the existing setup is worn. A trip to your local hardware store, armed with knowledge of what you require, can be quite helpful.
Step-By-Step Fixture Installation
1. Turn Off the Water Supply
Before any installation begins, ensure the water supply is turned off. This step prevents unexpected leaks and water damage.
2. Remove the Old Fixture
Carefully unscrew and remove the old fixture. It's crucial to do this gently to avoid damaging pipes. You might encounter some rust or mineral deposits if fixtures have been in place for a long time, so it’s a good practice to clean threads thoroughly.
3. Install the New Fixture
For a Faucet:
- Attach the new faucet base to the sink.
- Connect the supply lines to the faucet inlet lines, using plumber's tape to ensure a good seal.
- Secure the faucet with mounting nuts and the provided washers.
For a Showerhead:
- Screw the new showerhead onto the arm carefully after wrapping plumber's tape around the threads.
- Ensure it’s tight but avoid over-tightening, which could damage threads.
4. Turn On the Water Supply
Slowly turn the water supply back on. Check for leaks by running water through the new fixture. Re-tighten connections if necessary.
5. Testing
After installation, test the fixture thoroughly. Pay attention to water flow and temperature adjustments, particularly in fixtures like faucets and showerheads.
Troubleshooting Common Issues
Sometimes things don't go as smoothly as intended. Here are some potential hitches you might face when tackling your DIY Projects:
- Leaks: Check all connections for tightness and ensure threads are sealed with plumber's tape. Fixing Leaks
- Low Water Pressure: This might be due to blockage in the aerator or showerhead, which cleaning can resolve.
Final Thoughts
Installing plumbing fixtures can be quite gratifying. Though challenges might pop up, patience and perseverance are your best friends. Remember, it's okay to seek professional help if you're uncomfortable with any part of the installation.
Thank you for taking the time to join me in this journey. I hope these steps have been somewhat helpful and have inspired you to embark on your plumbing project. For any additional reading, resources like your local library or accredited online DIY forums can provide further insights.
Happy plumbing, and may your home improvement endeavors bring you the joy and satisfaction you seek!
